How to Create E-Invoices Using SleekBill Software A Step-by-Step Guide
E-Invoicing has developed into a fundamental process, being instrumental in compliance accuracy and efficiency to businesses working under GST. E-invoicing has become very easy for this software to work with, without any complications. E-invoicing is a unique process explained in this guide, commencing from activation and completion of issuing e-invoices through SleekBill, just to ease you through billing.
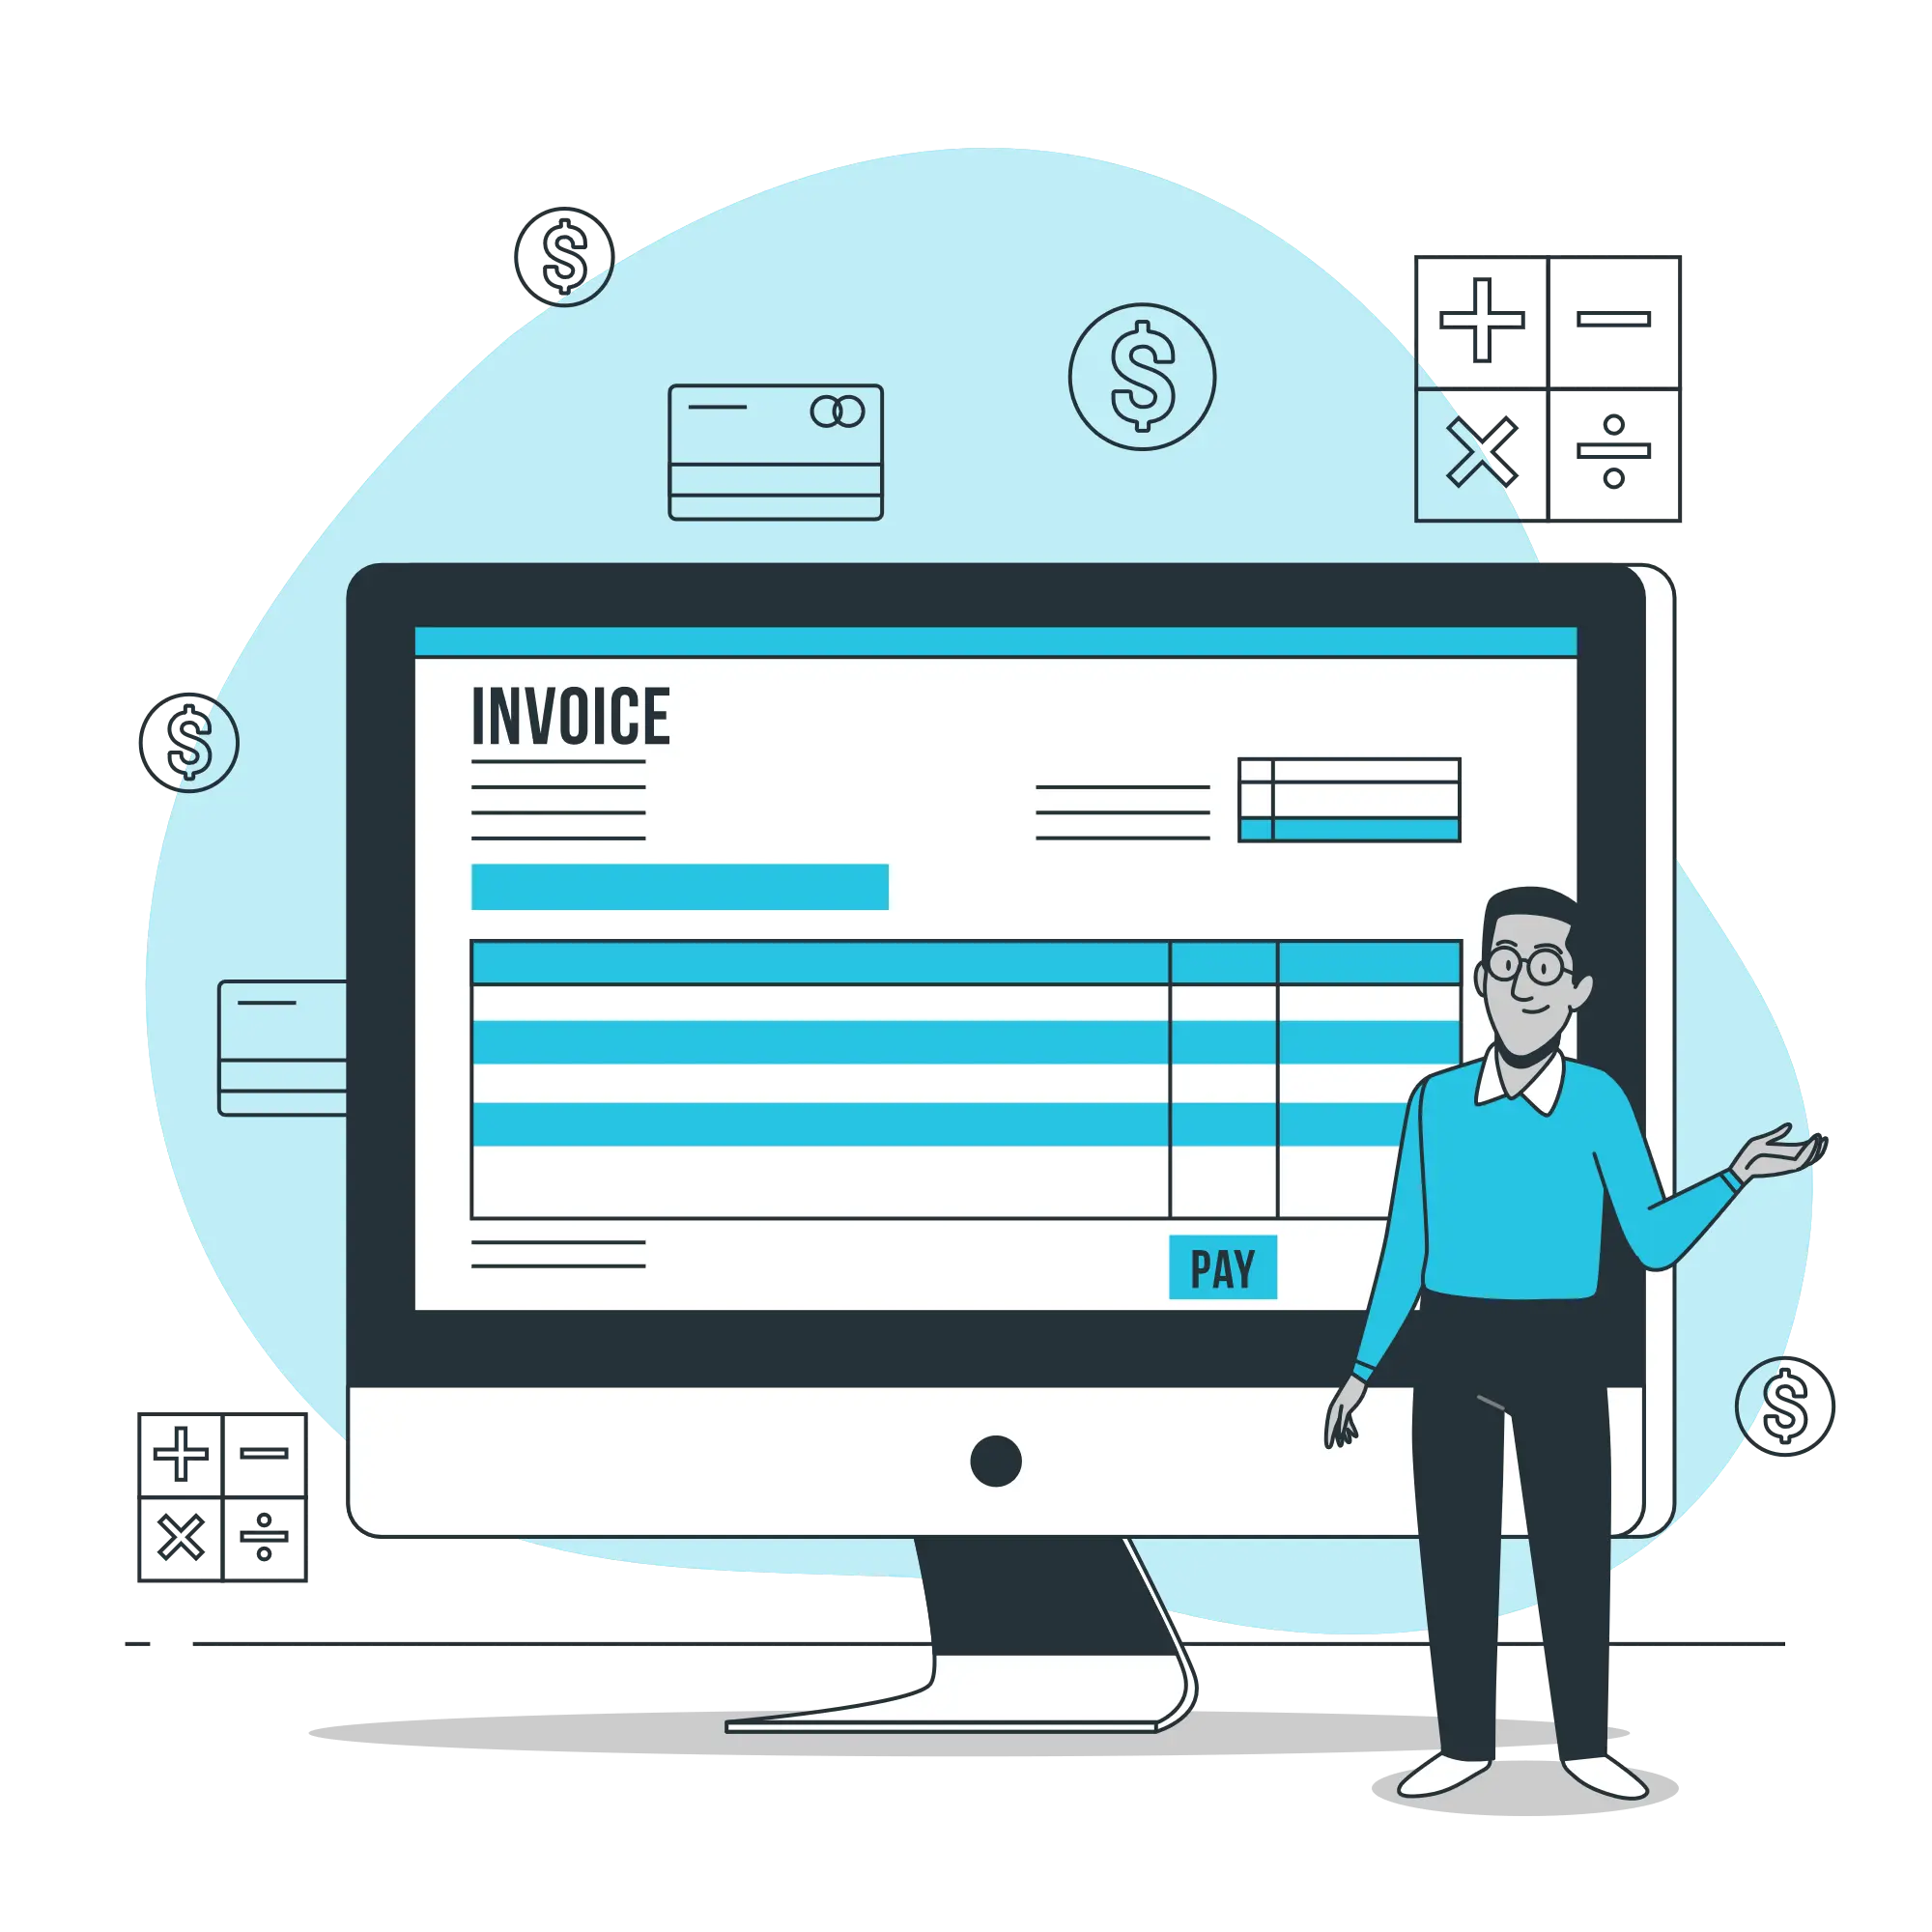
What is E-Invoicing?
An e-invoice is an electronic account which shall be prepared in a manner as specified by the GST Council itself, for the purpose of taxation thereby. At GST, these invoices, after validation, receive an IRN. E-Invoicing ensures:
Why Choose SleekBill for E-Invoicing?
SleekBill Software is designed to simplify e-invoicing by offering features like:

Easy API integration with the GST portal.

Automatic IRN and QR code generation.

User-friendly interface for invoice creation.

GST-compliant tax calculations.
Steps to Activate E-Invoicing in SleekBill
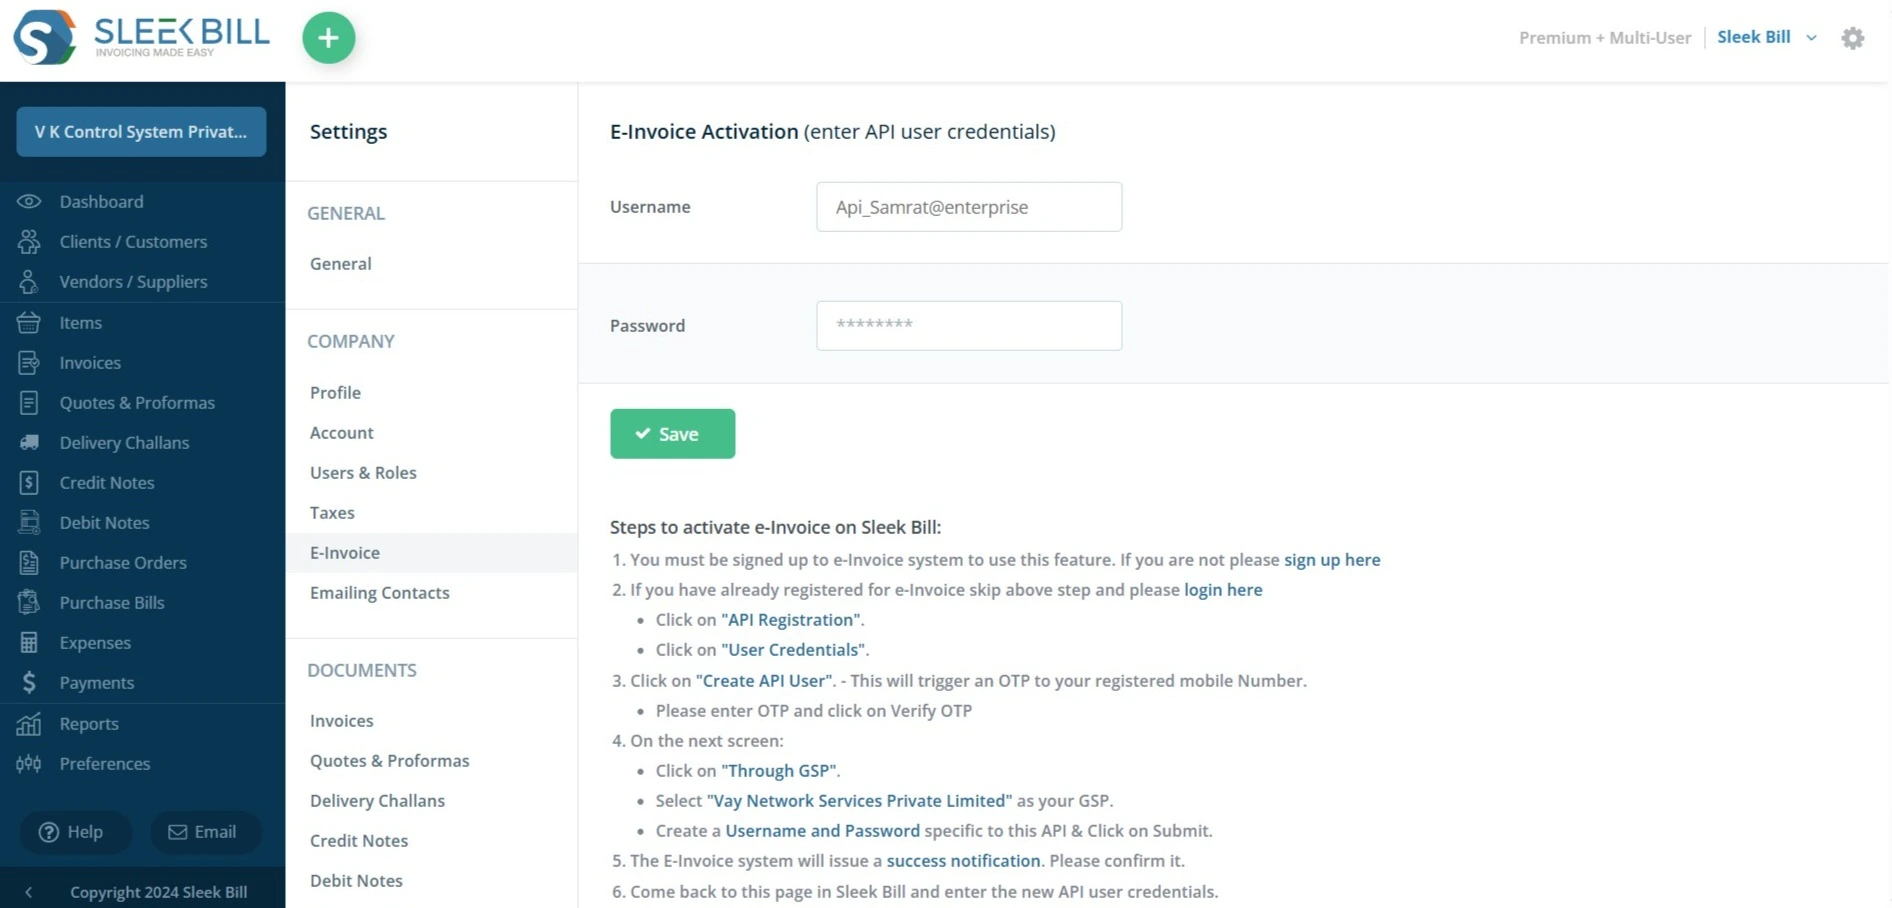
After creating the e-invoices, the feature of e-invoicing in SleekBill needs to be activated through registration on the GST e-invoicing portal.
Step-by-Step E-Invoice Configuration and Activation Process In Sleek Bill
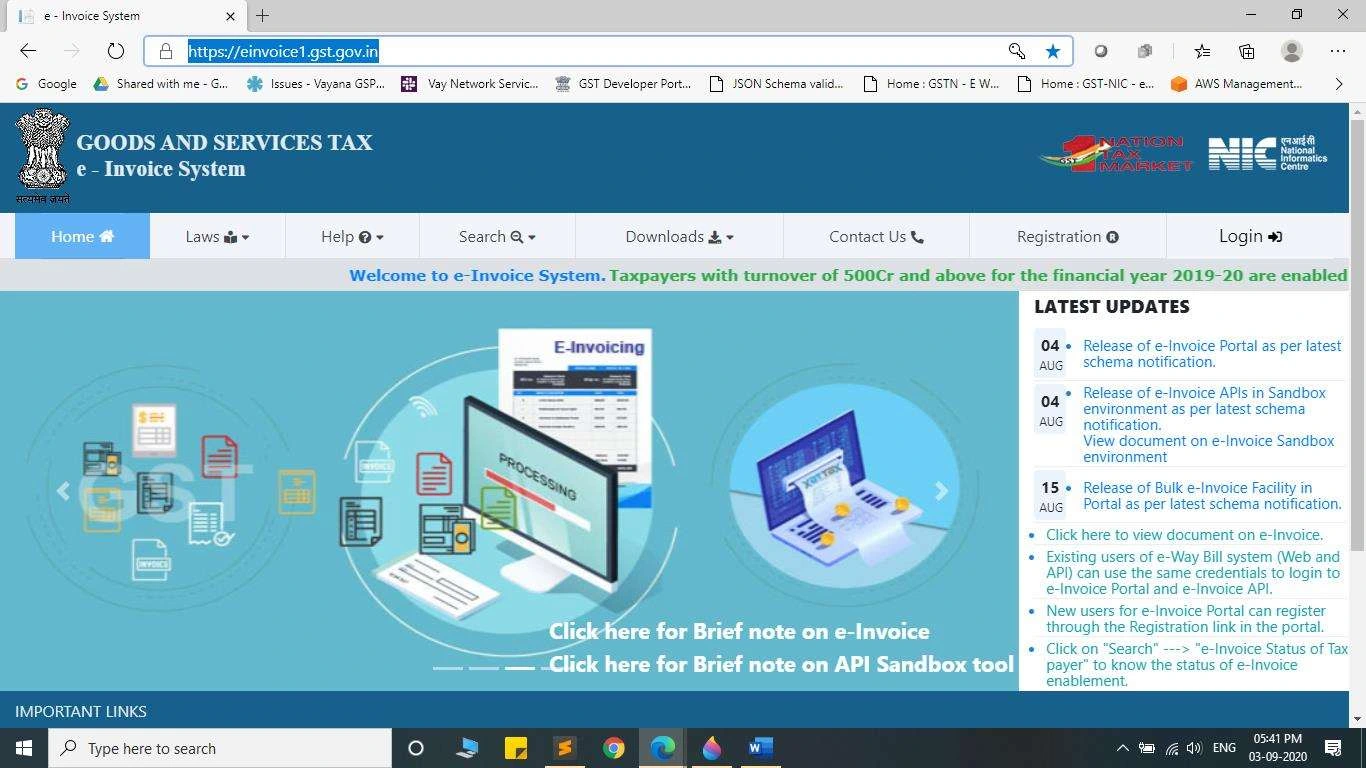
1. Sign Up for E-Invoicing: If you haven’t registered yet, sign up at einvoice1.gst.gov.in.
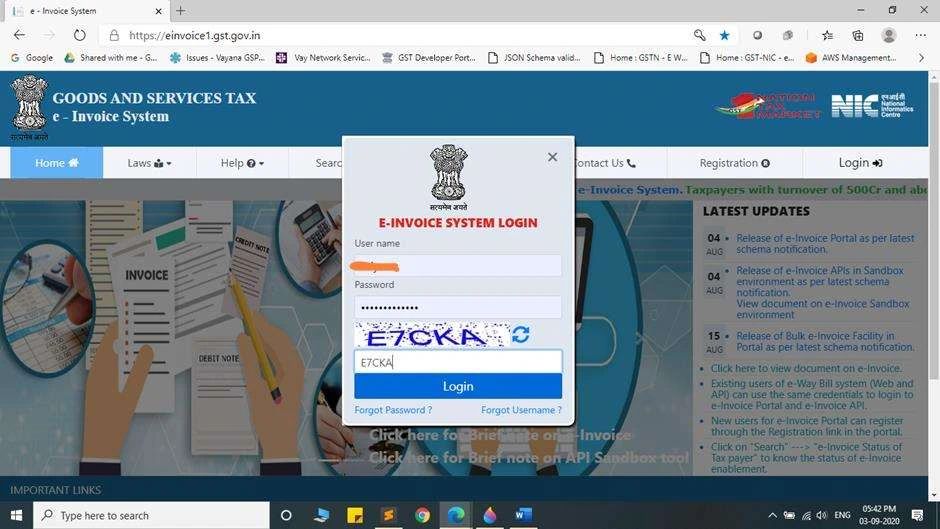
2. Log In to the E-Invoice Portal: Use your credentials to log in to the GST e-invoice portal.
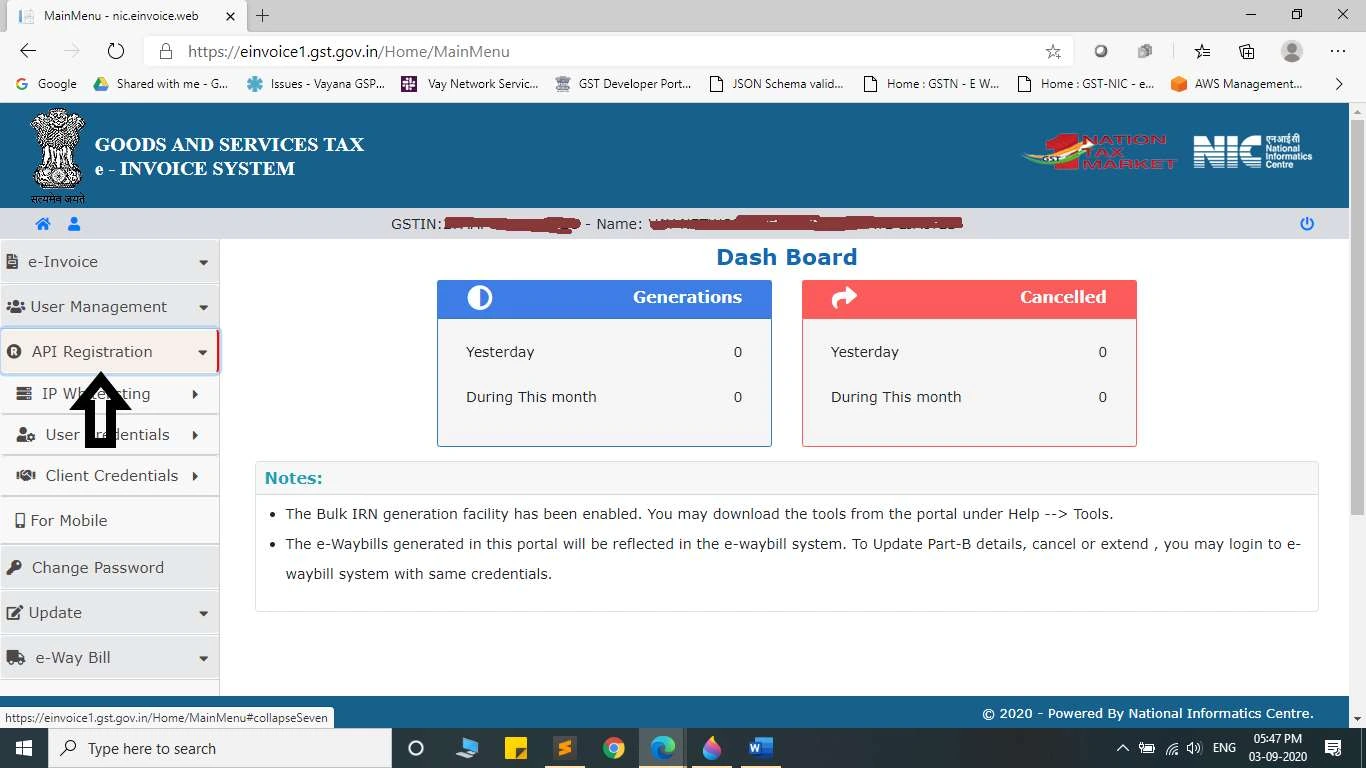
3. API Registration: Navigate to the API Registration section.
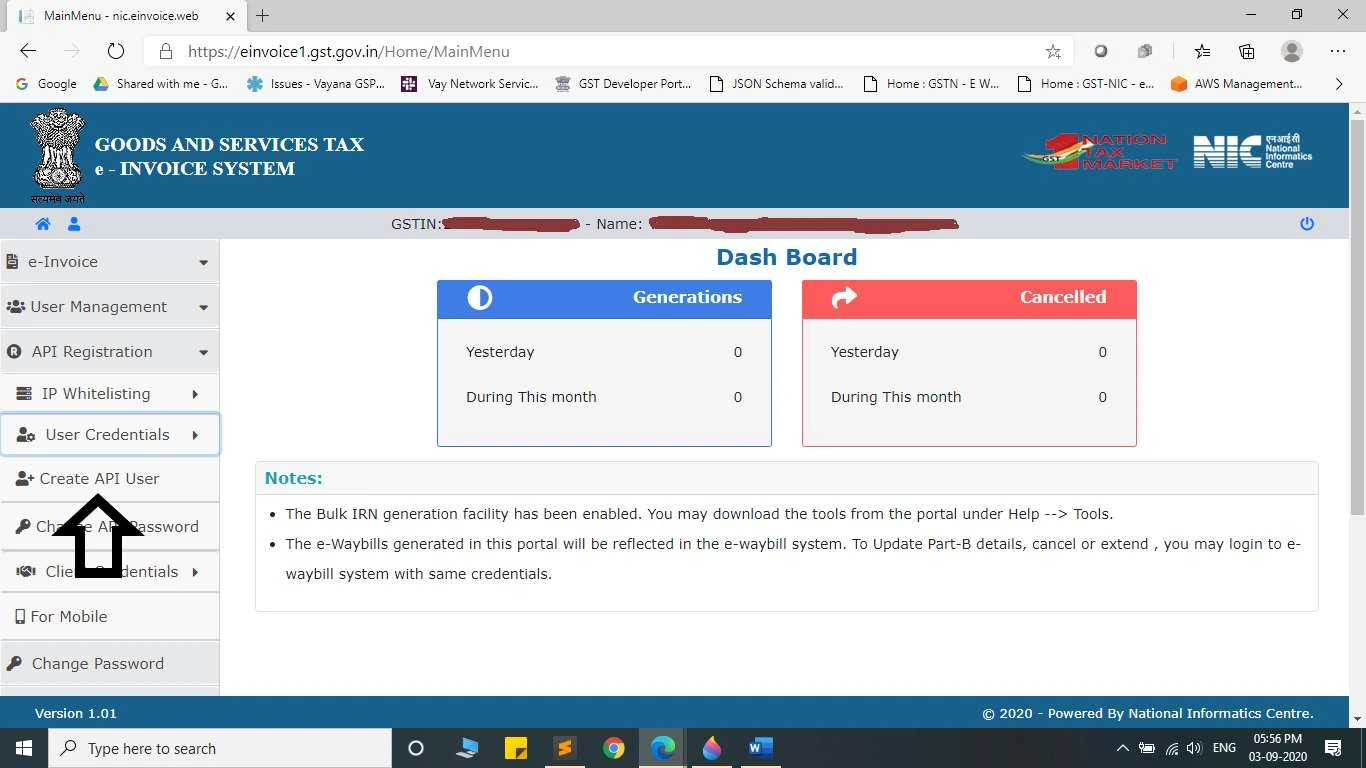
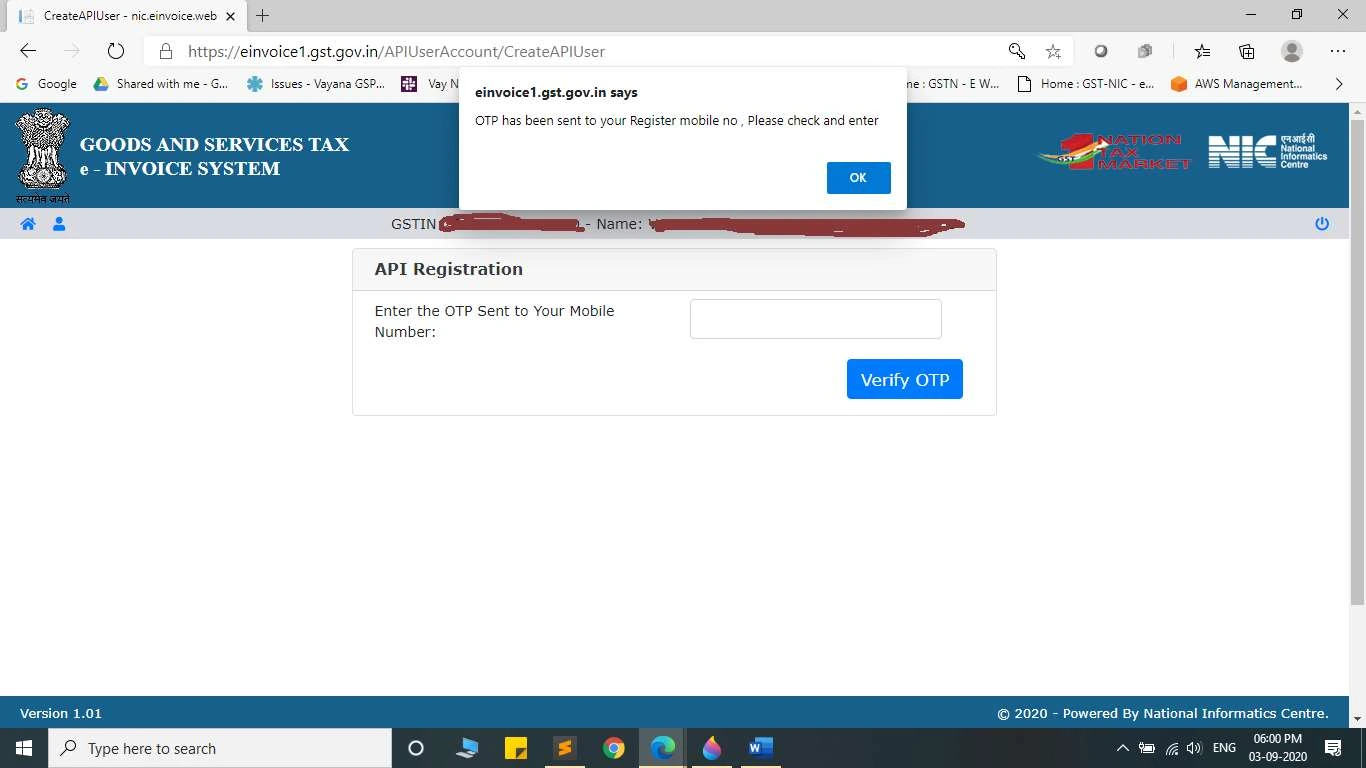
4. Create User Credentials: Click on User Credentials and request an OTP sent to your registered mobile number.
5.Verify OTP: Enter the OTP and click on Verify OTP to proceed.
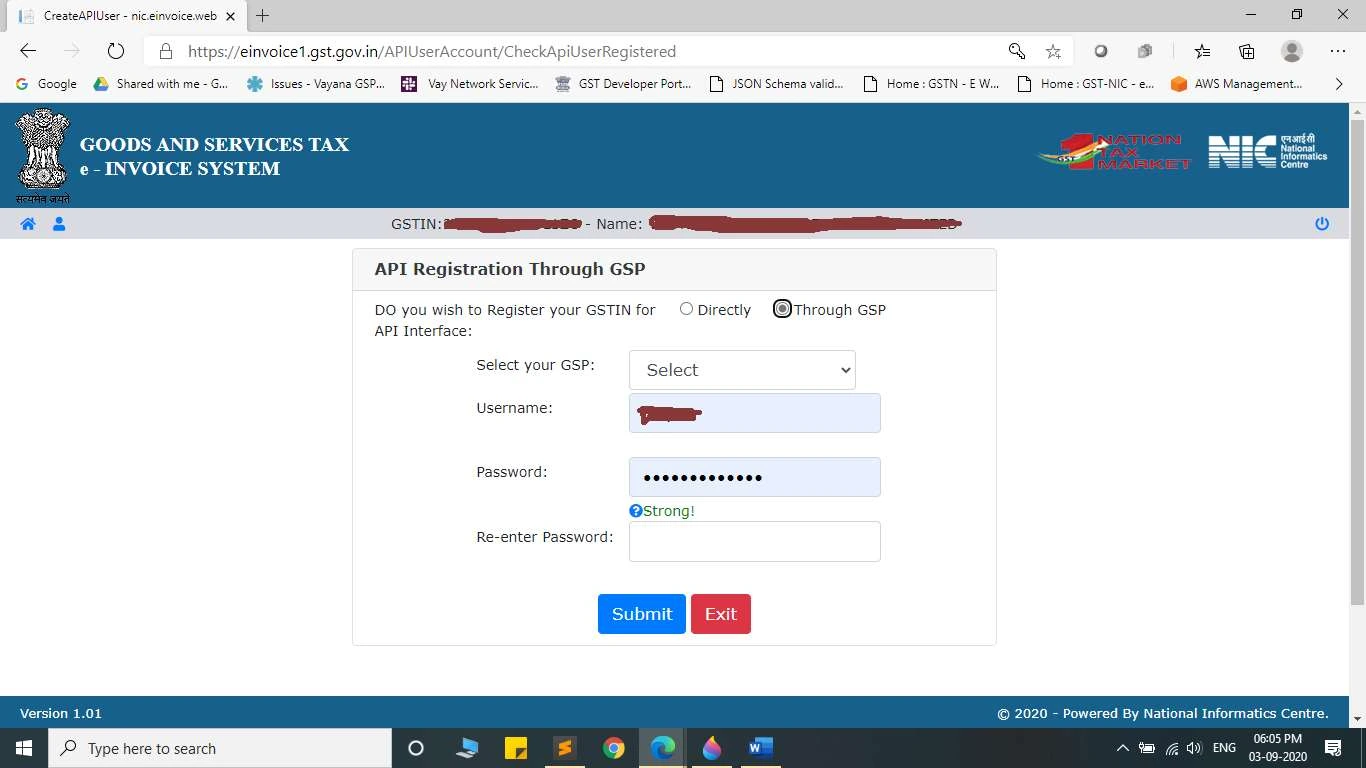
6.Select GSP: Choose “Vay Network Services Private Limited” as your GST Suvidha Provider (GSP).

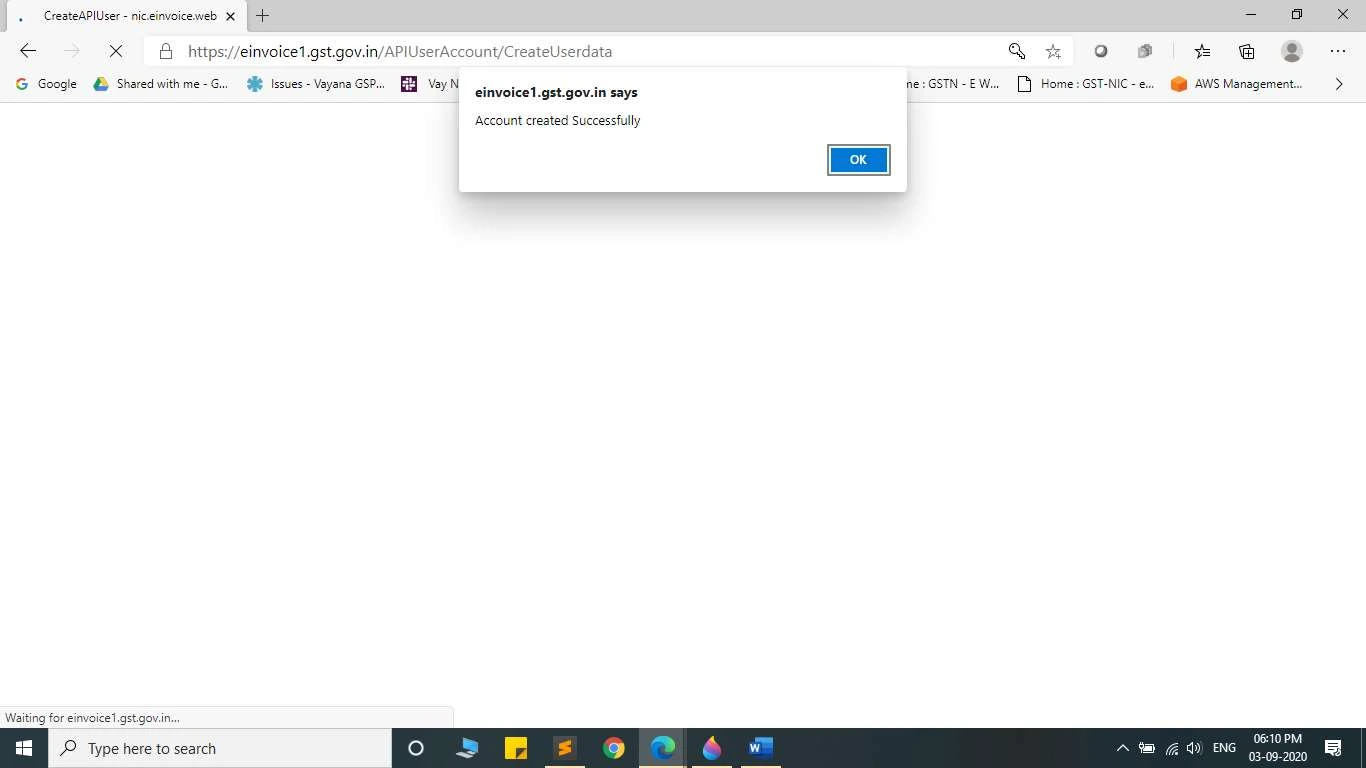
7.Get Success Notification:The portal will confirm successful API registration.
8.Integrate with SleekBill: Return to SleekBill and enter the new API credentials under the e-invoice activation section.
Steps to Create E-Invoices Using SleekBill
Once e-invoicing is activated, follow these steps to generate e-invoices seamlessly.
1. Enter API Credentials: Log in to SleekBill and ensure your API credentials are correctly entered.
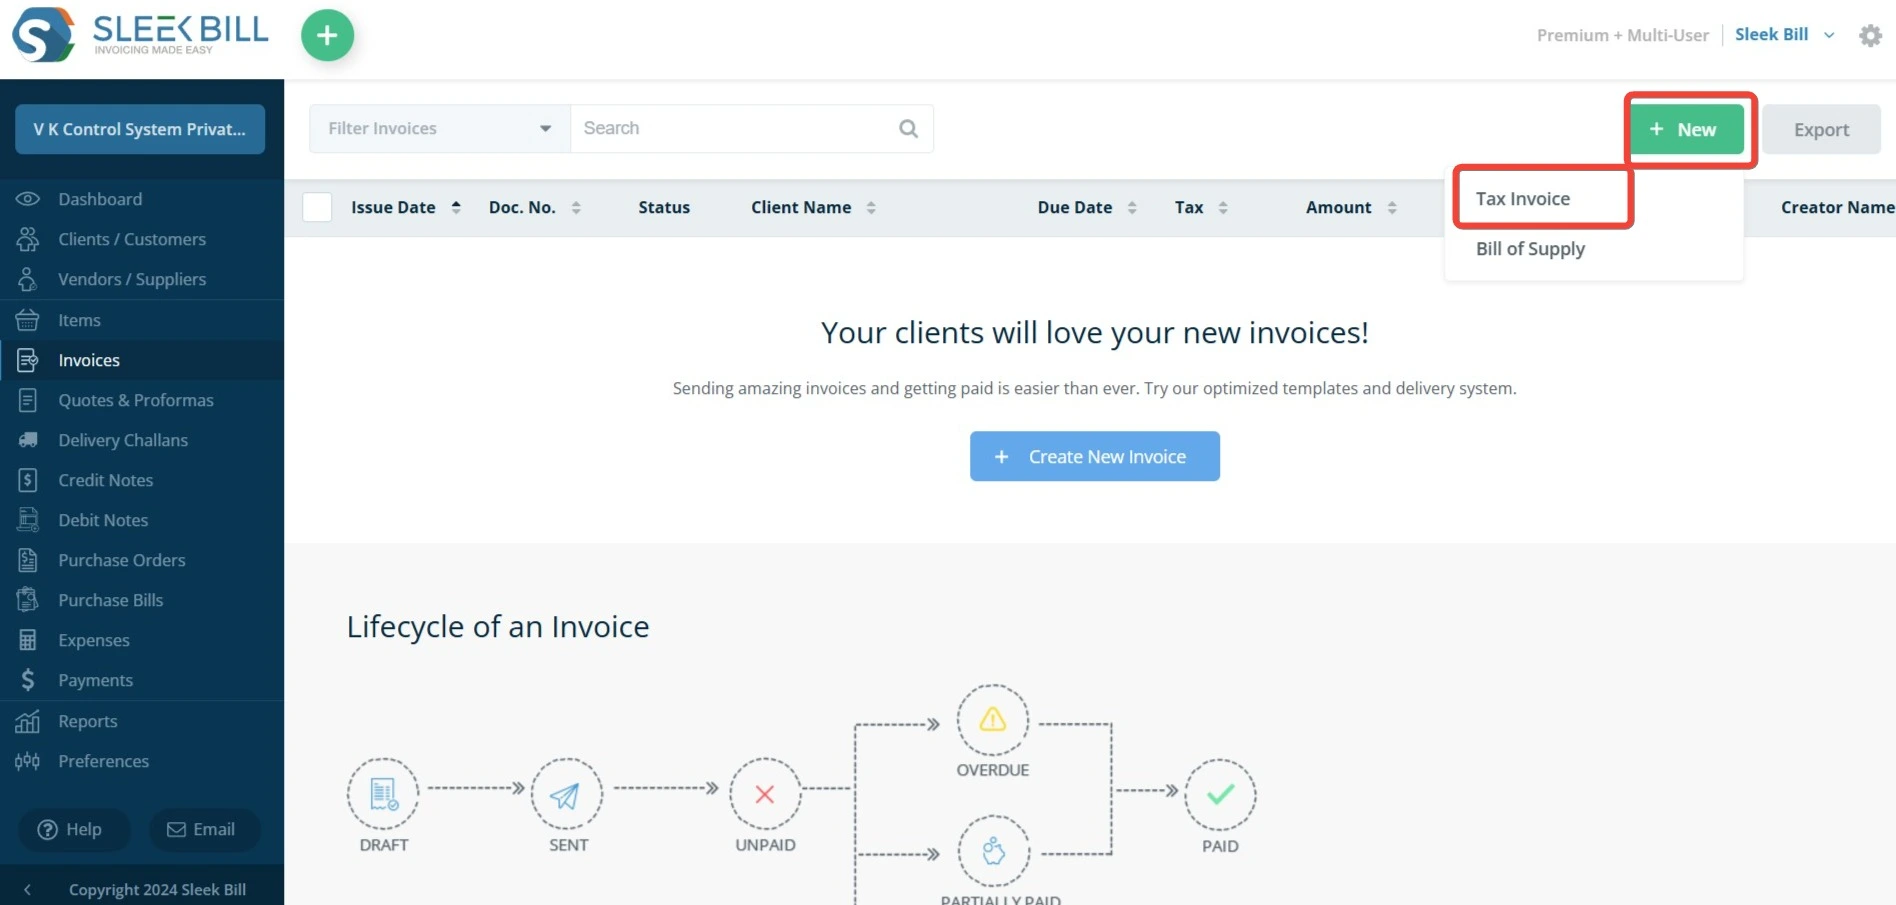
2. Select Invoice Option: On the SleekBill dashboard, click on the Invoice option.

3. Create a New Invoice: Click the + New button located on the top-right corner of the dashboard.
From the dropdown menu, select Tax Invoice.
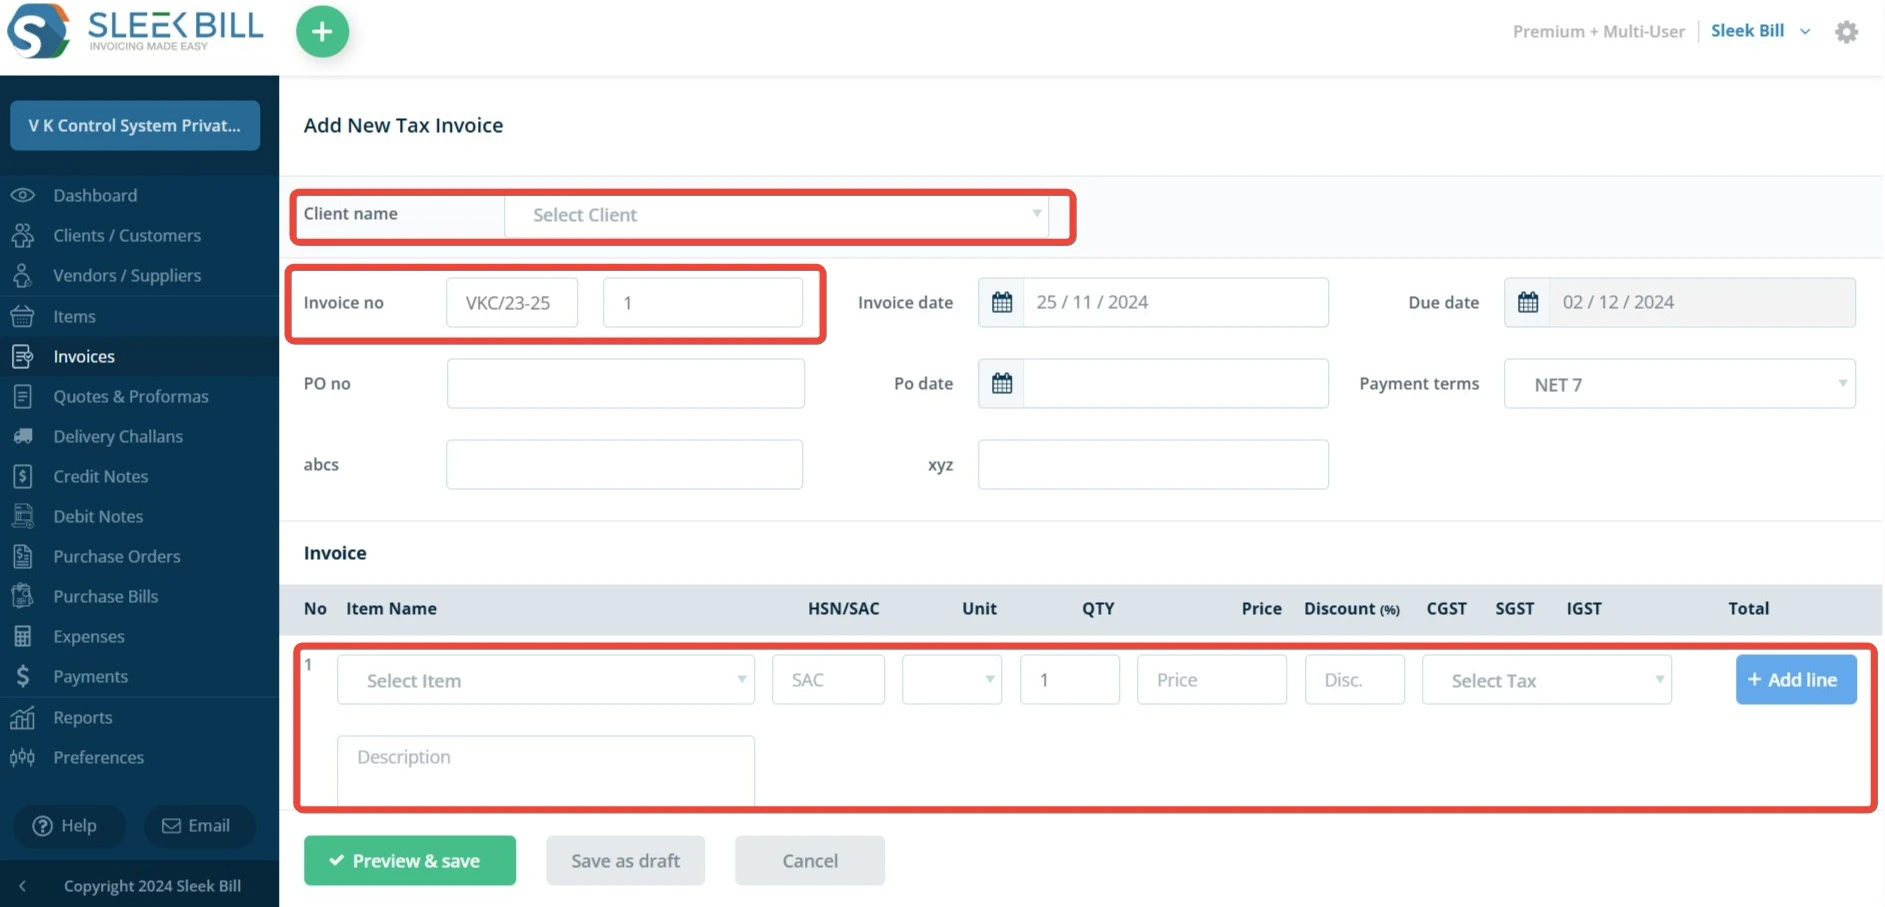
4. Fill in Invoice Details:On the New Tax Invoice page, enter the required details:
Select the client name from your saved list or add a new client.
Assign an invoice number.
Add item details, including product description, quantity, and rate.
Add UPI or other payment details for customer convenience.
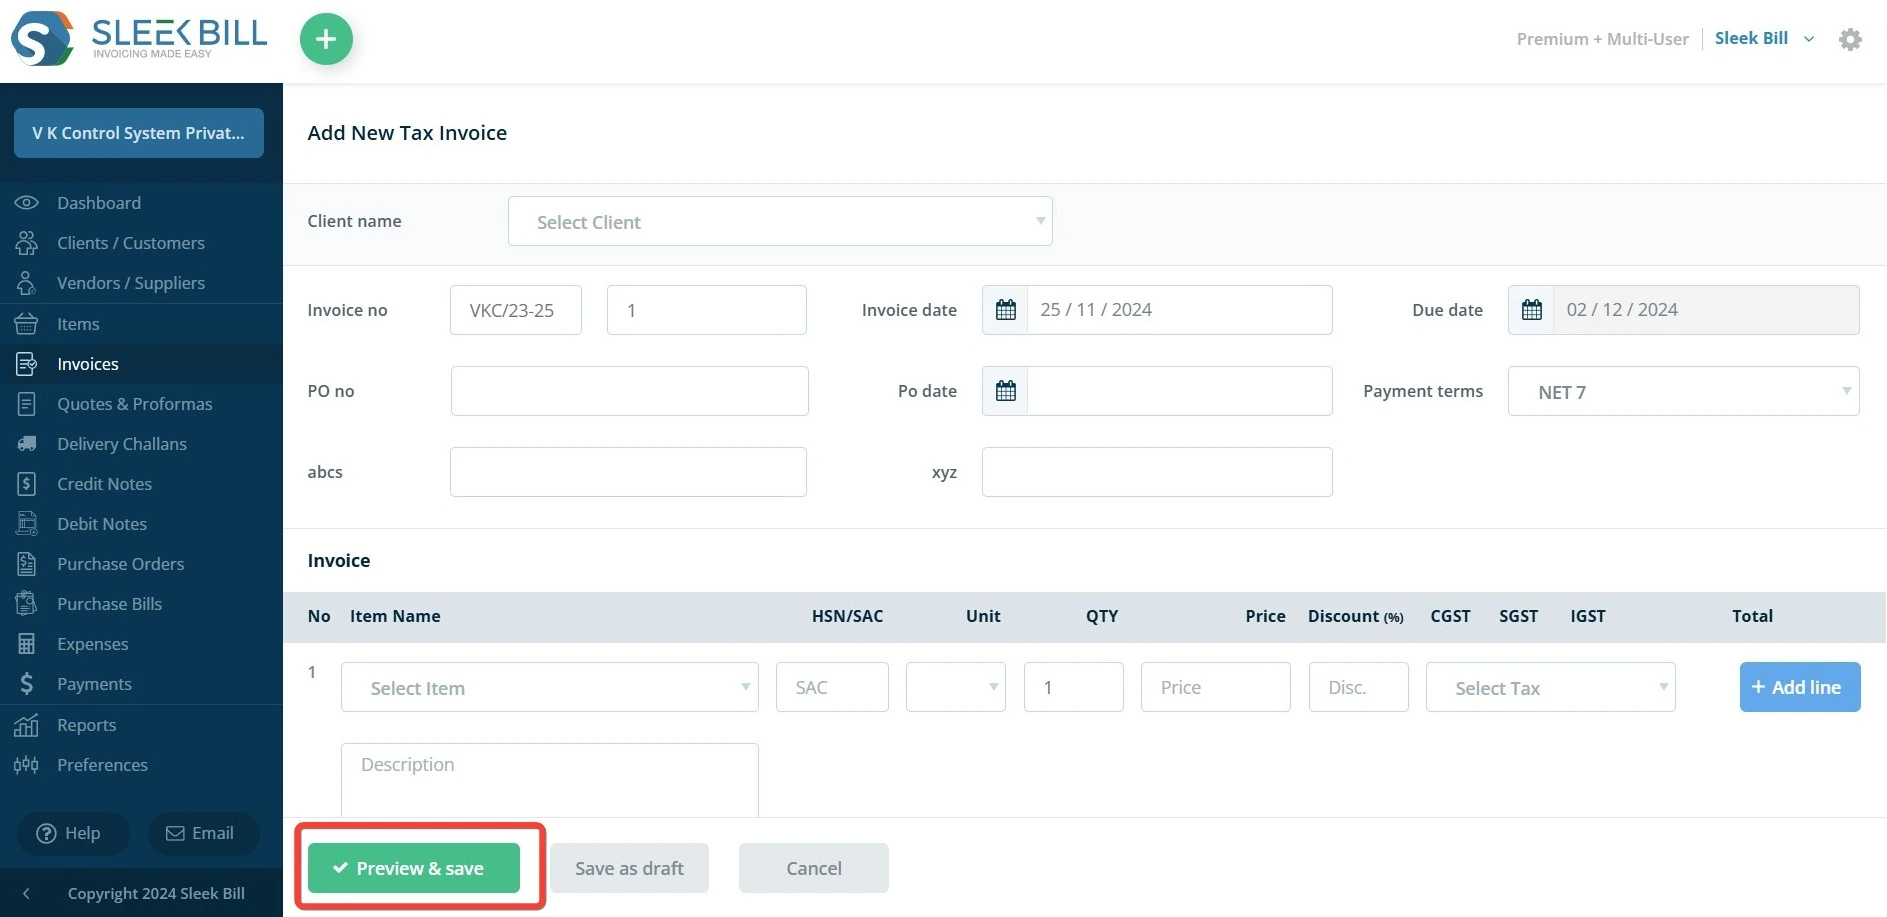
5. Preview and Save Click on Preview and Save to review the invoice and save it in your records.
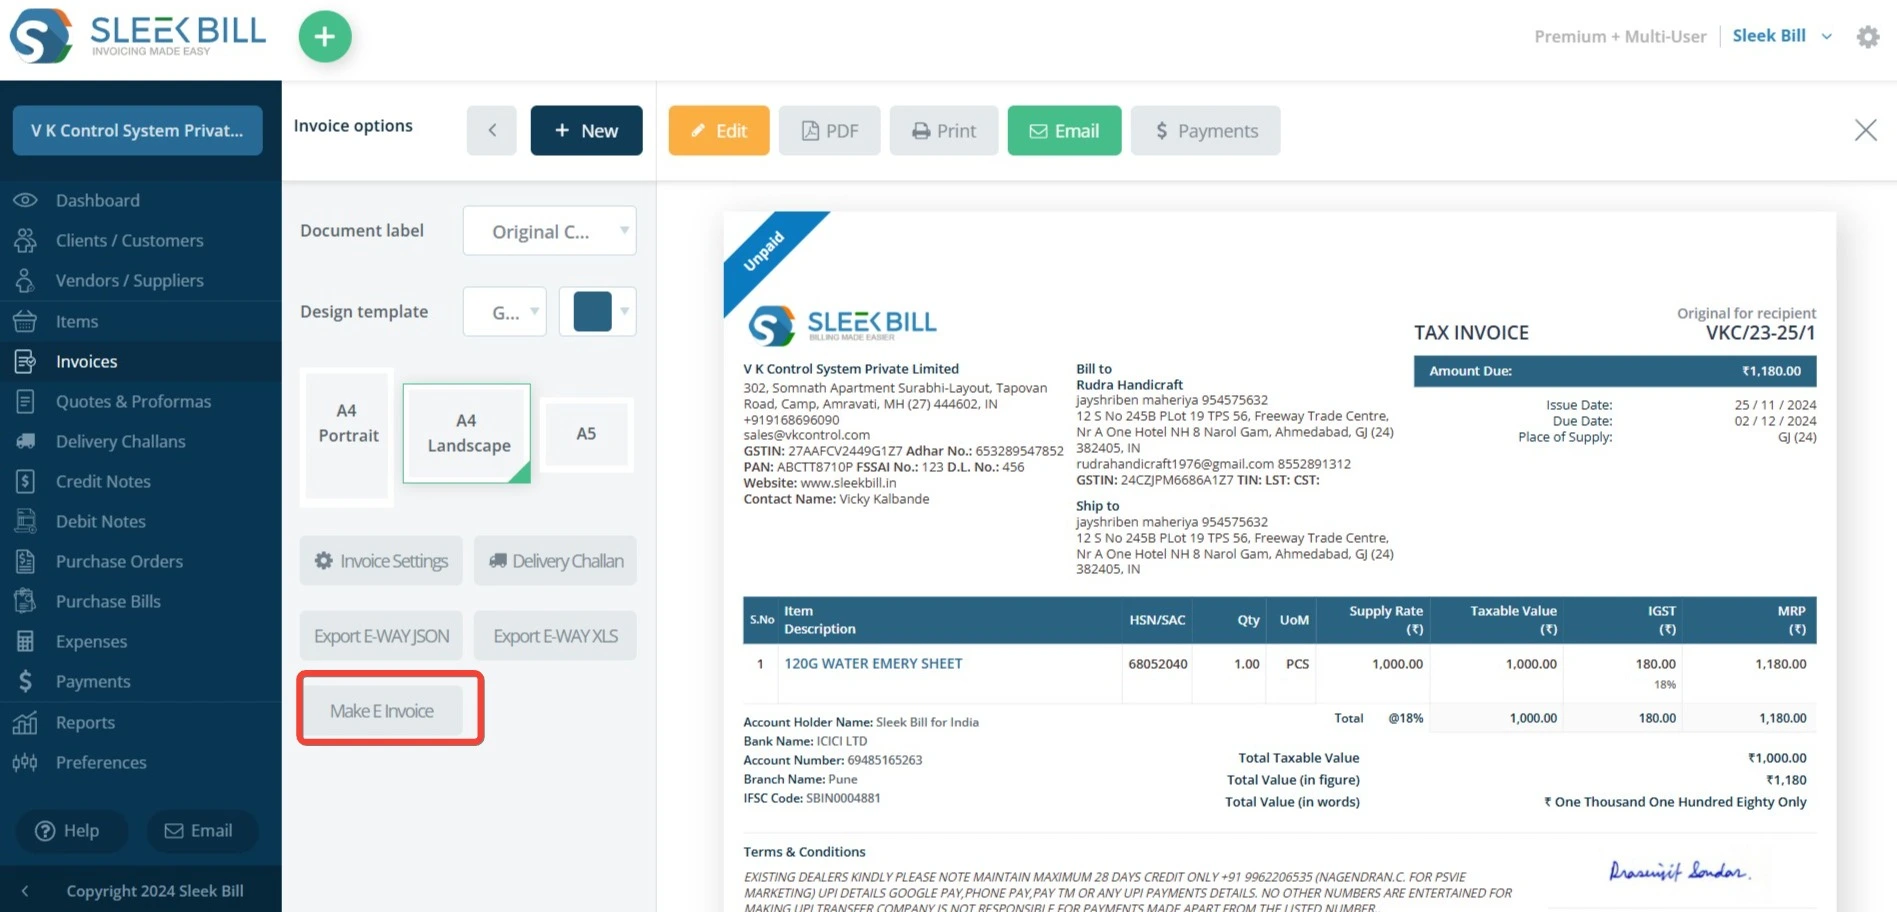
6. Generate the E-Invoice:
Go to the More Options menu and select Make E-Invoice.
SleekBill will automatically generate the e-invoice with:
IRN (Invoice Reference Number).
Acknowledgment Number.
Conclusion: Once the e-invoice is generated with the IRN and acknowledgment number, it is fully compliant with GST regulations. SleekBill ensures the process is seamless by automating the data transfer to the GST portal, saving you time and minimizing errors. You can now share the e-invoice directly with your client via email or download it for your records and hassle-free.
Benefits of Creating E-Invoices with SleekBill
Using a software tool, like Sleek Bill’s billing software, can streamline creating bills of exchange format and improve accuracy. Here’s how:
1. Automated Compliance: SleekBill ensures that all GST regulations are met during invoice generation.
2. Error-Free Billing: Eliminate manual errors with automated calculations and validations.
3. Time Efficiency: Generate e-invoices in just a few clicks, saving valuable time.
4. Real-Time Integration: Directly connect with the GST portal for instant IRN and acknowledgment.
5.User-Friendly Interface: Access and generate bills from anywhere with internet access.


 GST Invoice Format
 GST Billing Benefits


 Free training & support
 60K Happy Customers Worldwide
 Serious about